I love to experiment in the kitchen and try all types of new things. I come across a lot of unique recipes, ideas and presentations while I’m looking around different food websites and food blogs. There are so many different ideas and takes on food; and they are all so interesting. There are some that intrigue me so much that I bookmark them and have them as a must attempt recipe. I must say that my “must attempt” list keeps growing longer and longer as I come across more amazing recipes. Slowly but surely I will get to them all.
One of the things I have come across that I knew I must attempt were cake balls. Cake balls have experienced a growing popularity over the past few months; I’ve seen them popping up on multiple websites. They are just so much fun and there are so many different things that can be done with them. They can be make in different shapes, sizes, flavors and even put on sticks to be made into cake pops. They are so cute and the possibilities are almost endless!
After seeing these on quite a few websites I decided I wanted to attempt to make some. I knew the recipe would make a lot and I didn’t need those sitting around the house since it’s just Spencer and myself most of the time. I started thinking and I knew I wanted to do something for some of his co-workers so I decided I would do some goody baskets and fill it with some baked goods. This would be the perfect time for me to try out the cake balls and not have a ton sitting around the house.
The process of making these is pretty time consuming, so definitely keep that in mind whenever you start to make these. I probably made it a little more lengthy than most people because I decided to make a homemade cake rather than using a cake mix…but it was worth it. Plus I wanted to do Red Velvet cake and since that’s my bosses favorite cake I wanted to make sure it would meet her expectations! (I had to take some goodies to her too!) Even if you don’t do a homemade cake it would be better to give yourself a couple of days to do the whole process.
I wanted to do Red Velvet cake because of Christmas and I thought that would look awesome and be a bright burst of color once bitten into. I had never made a “from scratch” Red Velvet cake or any Red Velvet cake for that matter, so I hunted for the perfect recipe for quite some time and I finally came across a recipe I wanted to try on Pinch My Salt. Once I found the recipe I made sure I had everything and I got to mixing. The whole process of making the cake and baking it was actually not as hard as I had initially imagined. I don’t know what I was scared about since I tend to bake quite a bit but this cake has always been one of those that seemed to have quite a bit of difficulty. I’m proud to say I overcame my fear of Red Velvet Cake and I’m so glad I did because this cake turned out incredible! This cake also passed the test of my toughest critic, my boss…the lover of Red Velvet Cakes. Since this cake is her all time favorite she has tasted many and it’s what her mom cooks for her every time she comes to visit…so I was under double pressure, her favorite cake and it’s also a cake her mom makes. I was pretty proud when I heard from her that she LOVED the cake. I also got awesome reviews from the other recipients of the gift baskets as well as a few other people who tried them.
I had so much fun making these. It’s a great way to get the creative juices flowing and the possibilities are endless. Since this was my first time making these I decided I wanted to keep it as simple as possible just so I could have a fair chance of completing them and since I also had some other goodies to make to go in the baskets. I will probably experiment in the future with different shapes and possibly even with the cake pops. This is definitely a fun and different way to serve up a classic dessert. Let your imagination run wild with the different colors, flavor combinations and everything.
Red Velvet Cake Balls
For starters…Red Velvet Cake
Ingredients:
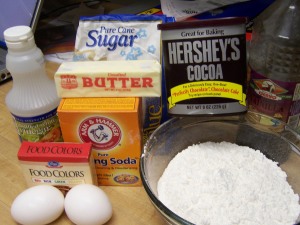
2 1/2 cups sifted cake flour
1 teaspoon baking powder
1 teaspoon salt
2 Tablespoons cocoa powder (unsweetened)
2 oz. red food coloring
1/2 cup unsalted butter, at room temperature
1 1/2 cups sugar
2 eggs, at room temperature
1 teaspoon vanilla extract
1 cup buttermilk, at room temperature
1 teaspoon white vinegar
1 teaspoon baking soda
Directions:
Preheat oven to 350 F
Flour and grease a 9×13 pan.
Into a medium bowl, sift together cake flour, baking powder, and salt; set aside.
In a small bowl, mix food coloring and cocoa powder to form a paste; set aside. (Be careful with the food coloring…don’t get it on your clothes or counter tops because it does stain!!!)
Place butter and sugar in a large bowl and beat together until light and fluffy, about three minutes. Make sure to scrape down the bowl occasionally, beat in eggs, one at a time, then beat in the vanilla and the cocoa paste.
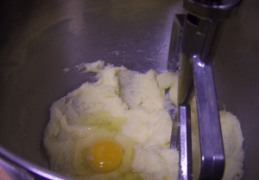
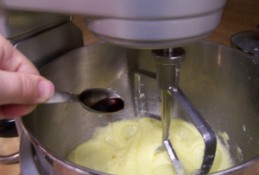
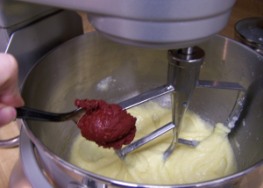
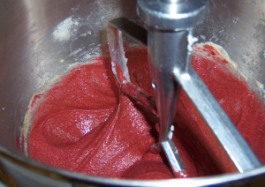
Add one third of the flour mixture, beat well, then beat in half of the buttermilk. Beat in another third of flour mixture, then second half of buttermilk. Finally beat in the last third of the flour mixture, making sure to scrape down the bowl with a spatula.
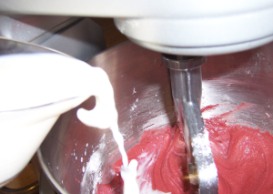
Make sure the pan is greased/buttered, floured, and nearby. In a small bowl, mix vinegar and baking soda. Yes, it fizzes! Add it to the cake batter and stir well to combine. Pour batter into the greased pan place in a preheated 350 degree oven.
Bake for 25-30 minutes. Check early, cake is done when a toothpick inserted in the center comes out clean.
Let cake cool completely.
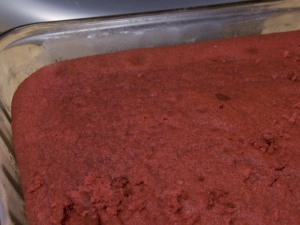
Once the cake has cooled completely, crumble entirely.
To combine make the cake into balls mix in buttercream icing.
Buttercream Icing:
Ingredients:
1/4 Cup shortening
1/4 Cup butter
1/2 Teaspoon vanilla extract
2 Cups confectioners sugar
1 Tablespoon milk
Directions:
Cream butter, shortening, and vanilla in a large bowl. Mix in the sugar 1 cup at a time, beating well after each cup is added. Mix in the milk and continue beating until light and fluffy.
***If you prefer you can use a container of store bought frosting.
Once the frosting is prepared, mix the frosting in with the crumbled cake and combine completely.
Once the cake and icing are combined, form cake balls to desired size (I made them about the size of golf balls) and place on a baking sheet lined with parchment/wax paper. Continue this process until all the cake is gone.
Once cake balls are made, cover with plastic wrap or foil and place in refrigerator or freezer. Leave the balls in the freezer/fridge over night to ensure they are set and won’t crumble when dipped into the chocolate.
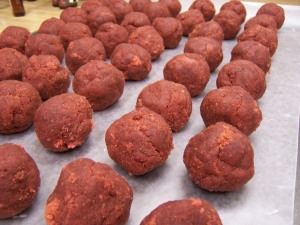
***I added a little something extra to mine. I took some of the buttercream and placed it in a piping bag and filled the cake balls with a little frosting so there would be a surprise inside!
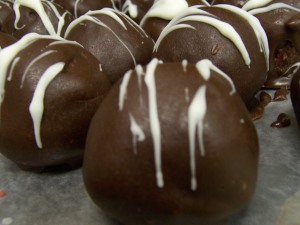
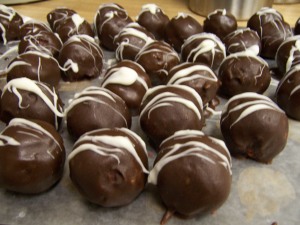
Once the cake balls have chilled and are set they are ready to dip in the chocolate. In a double boiler melt desired flavor of chocolate ( I used 1/2 semisweet and 1/2 milk chocolate). Stir chocolate until smooth, once smooth begin dipping the cake balls into the chocolate.
Place dipped cake balls on wax/parchment paper. Continue the dipping process until all are covered.
After all were covered I placed mine back in the fridge to let set up. Once they set up I drizzled some white chocolate over the tops of them.
